Understanding Scans – How to Read Your Reports Correctly
Learn what your monitoring results mean and how to interpret issues and warnings accurately.
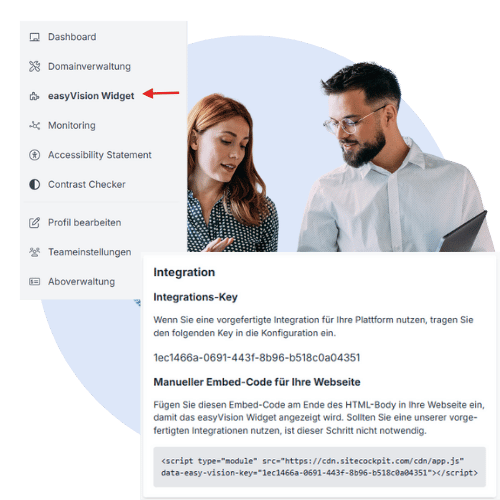
The easyVision widget can be integrated into your website within minutes—no technical expertise required. In this guide, we’ll walk you through how to insert the embed code, position the widget, and customize its appearance to match your needs.
Find your unique embed code in the SiteCockpit backend under “easyVision Widget” or via Domain Settings → “Widget” tab. Copy the “Manual Embed Code for Your Website” snippet and paste it just before the closing

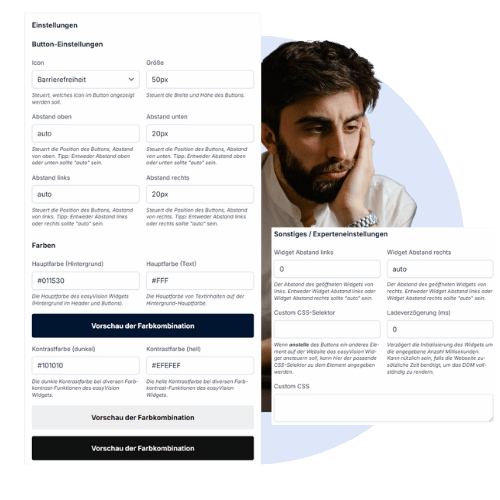
After embedding, choose where the widget appears. By default, the button shows in the bottom-right corner. Use the “Widget Right Margin” and “Widget Left Margin” settings to move it—for example, left or centered.
You can also customize the button’s icon, size, color, and style. On mobile devices, verify positioning—especially if you use other overlays (e.g., Trusted Shops) to avoid overlap.

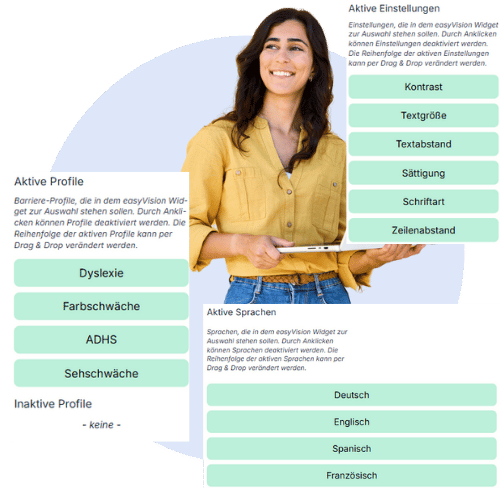
In the backend, select which features to offer in the widget—e.g., contrast mode, reading modes, text size. Click to add or remove each option.
Predefined accessibility profiles are also available for users to activate with one click. Language settings can be customized and toggled on or off for multilingual sites.

Practical guides, legal updates, and concrete solutions for your SiteCockpit integration.

Learn what your monitoring results mean and how to interpret issues and warnings accurately.

The BFSG mandates accessibility—find out what you need to do to stay compliant.

Efficiently organize user access with the integrated user management system.

From theory to practice: systematically meet WCAG guidelines with SiteCockpit.